Tracking down leaks in air conditioning systems, refrigerators, or other sealed fluid systems isn’t easy without the right gear. Traditional methods often miss tiny leaks or force you to take everything apart. Fluorescent dye leak detection changes the game by making even the smallest leaks visible.
A fluorescent dye leak detector works by injecting a special dye into the system that circulates with the fluid and escapes at leak points, then using an ultraviolet lamp to make the dye glow brightly at leak locations. It’s a straightforward process that can uncover more than one leak at a time. The dye blends with refrigerant oil or whatever fluid’s inside, then seeps out anywhere there’s a gap.
This approach is now pretty common in HVAC, automotive repair, and lots of industrial settings. It’s accurate and saves a ton of guesswork. Anyone—techs or homeowners—can spot and fix leaks faster once they understand how this works.
Key Takeaways
- Fluorescent dye gets added to a system and circulates until it escapes through leaks, where you can spot it with UV light.
- The detection process usually takes between 5 and 45 minutes, depending on system size.
- This method works well for refrigerant systems, HVAC equipment, and a range of industrial fluid setups.
Fundamentals of Fluorescent Dye Leak Detection
Fluorescent dye leak detection uses special dyes that glow under UV light to highlight leak spots. The trick is in the chemistry—fluorescent compounds and UV tech team up to make even pinhole leaks visible to the naked eye.
What Is Fluorescent Dye Leak Detection?
Fluorescent leak detection works by putting a special dye into fluid systems to find leaks. A technician adds the dye, which mixes with the system’s fluid and travels everywhere. If there’s a leak, the dye leaks out too and settles at the problem spot.
The dye stays invisible under regular lighting. But once you shine a UV lamp over the area, it lights up at leak points. Even tiny leaks become obvious.
The routine is simple: add dye, then use UV light to look for leaks. Depending on the system, detection takes anywhere from 5 to 45 minutes. This method fits HVAC units, car AC, hydraulics, plumbing—you name it.
The Science Behind Fluorescence
Fluorescence happens when certain molecules soak up light at one wavelength and release it at another, longer wavelength. Fluorescent dyes have molecules that grab UV light—totally invisible to us—and then emit visible light as a bright glow.
When you hit the dye with UV, its molecules get excited and jump to a higher energy state. As they chill back down, they let off energy as visible light. That’s the glow you see at leak sites.
The dyes work with whatever fluid you mix them into—refrigerant, oil, coolant, even water. Good fluorescent dyes hold up across a huge range of temperatures and still glow under UV.
Types of Fluorescent Dyes Used
You’ll need different dyes for different systems, depending on the fluid and how tough the conditions are. Here’s a quick rundown:
HVAC/R Dyes are made for AC and refrigeration. These handle temps from -80°C to 250°C and work with all sorts of refrigerants.
Automotive Dyes are built for car cooling systems, power steering, or transmission fluid. They have to survive the heat and stress under the hood.
Industrial Dyes work in hydraulics, fuel systems, and other industrial setups. These need to play nice with oils and other fluids.
Universal Dyes can cover different fluid types but might not be as tough as the specialized stuff in extreme conditions. The best dyes skip co-solvents, so they won’t damage your system or mess with performance.
Step-By-Step Operation of a Fluorescent Dye Leak Detector
The whole process is pretty methodical. You add the dye, let it circulate with the system’s fluid, then use UV light to hunt for leaks. The dye leaks out where the fluid does, and UV makes it shine.
Injection or Application of Dye
A technician injects a measured dose of dye into the system. The dye has to match the fluid—refrigerant, oil, water, whatever’s running through those lines.
Getting the dose right matters. Too much dye can mess with performance, but you usually only need a little. The injection process for refrigerant systems uses service ports or special injectors.
Application methods change depending on the system. HVAC uses direct injection into refrigerant lines, while cars might need dye added through the radiator cap or reservoir.
Circulation in System Fluids
Once you’ve added the dye, it needs to circulate with the fluid. How long this takes depends on the system’s size and complexity. Small setups might only need a few hours; big industrial ones could take a whole day.
The system should be running normally during this time so the dye mixes everywhere. Letting it operate ensures the dye gets into every nook and cranny.
As the dye circulates, it escapes and pools at every leak. It seeps out wherever the fluid does, leaving behind visible traces for inspection.
Leak Detection With UV Light
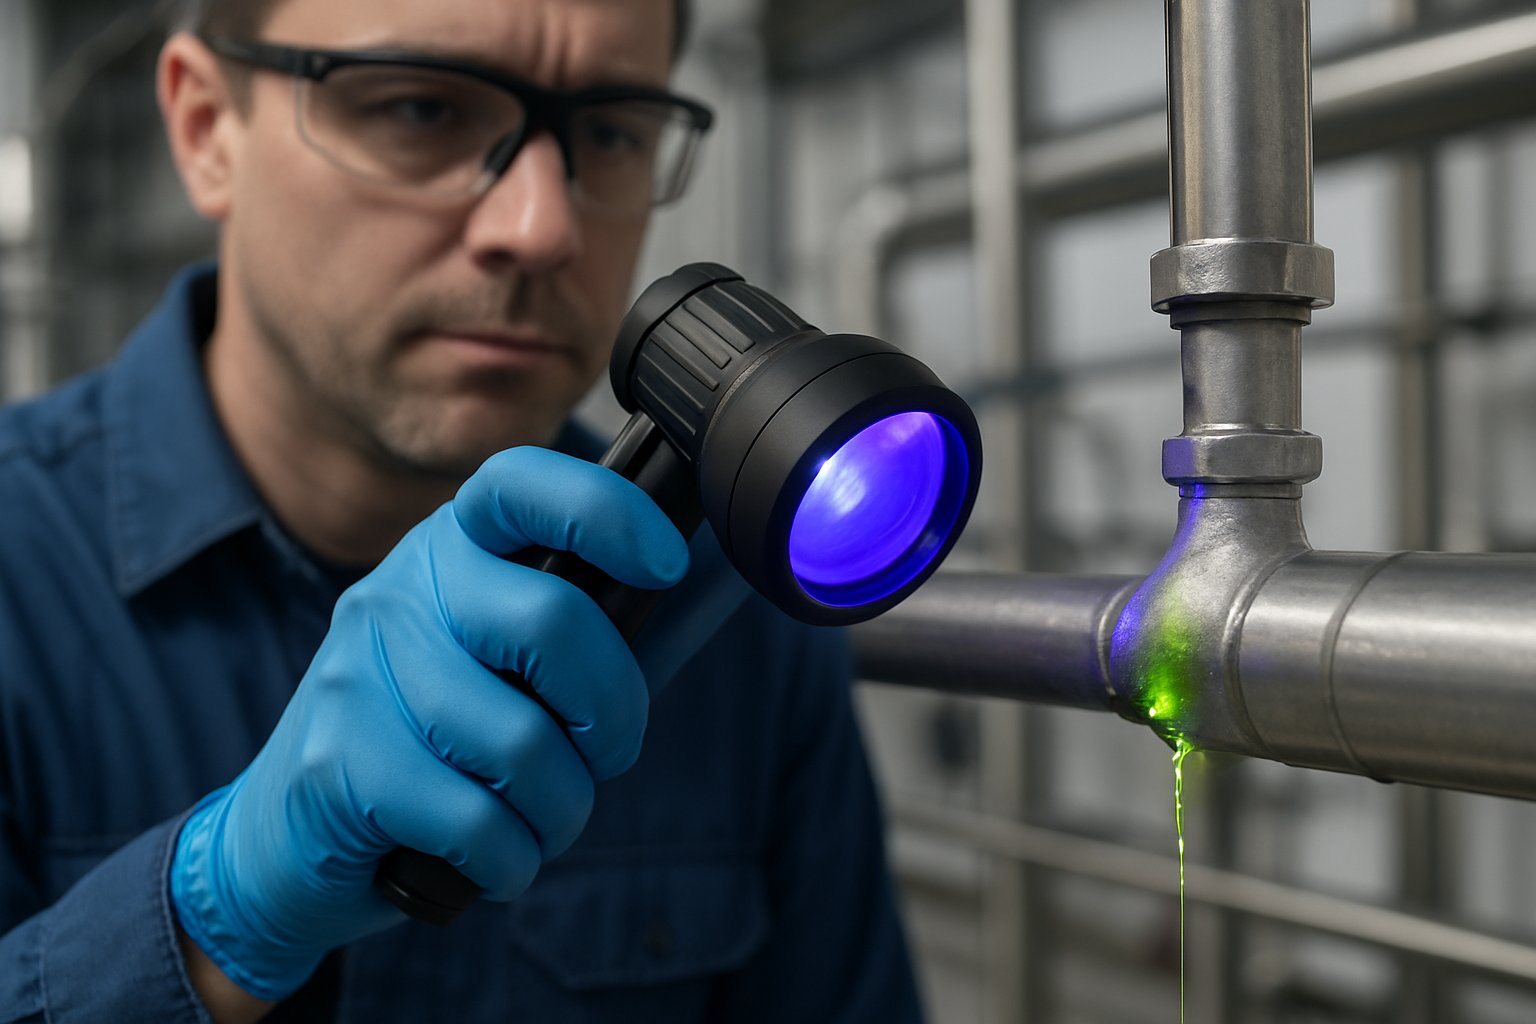
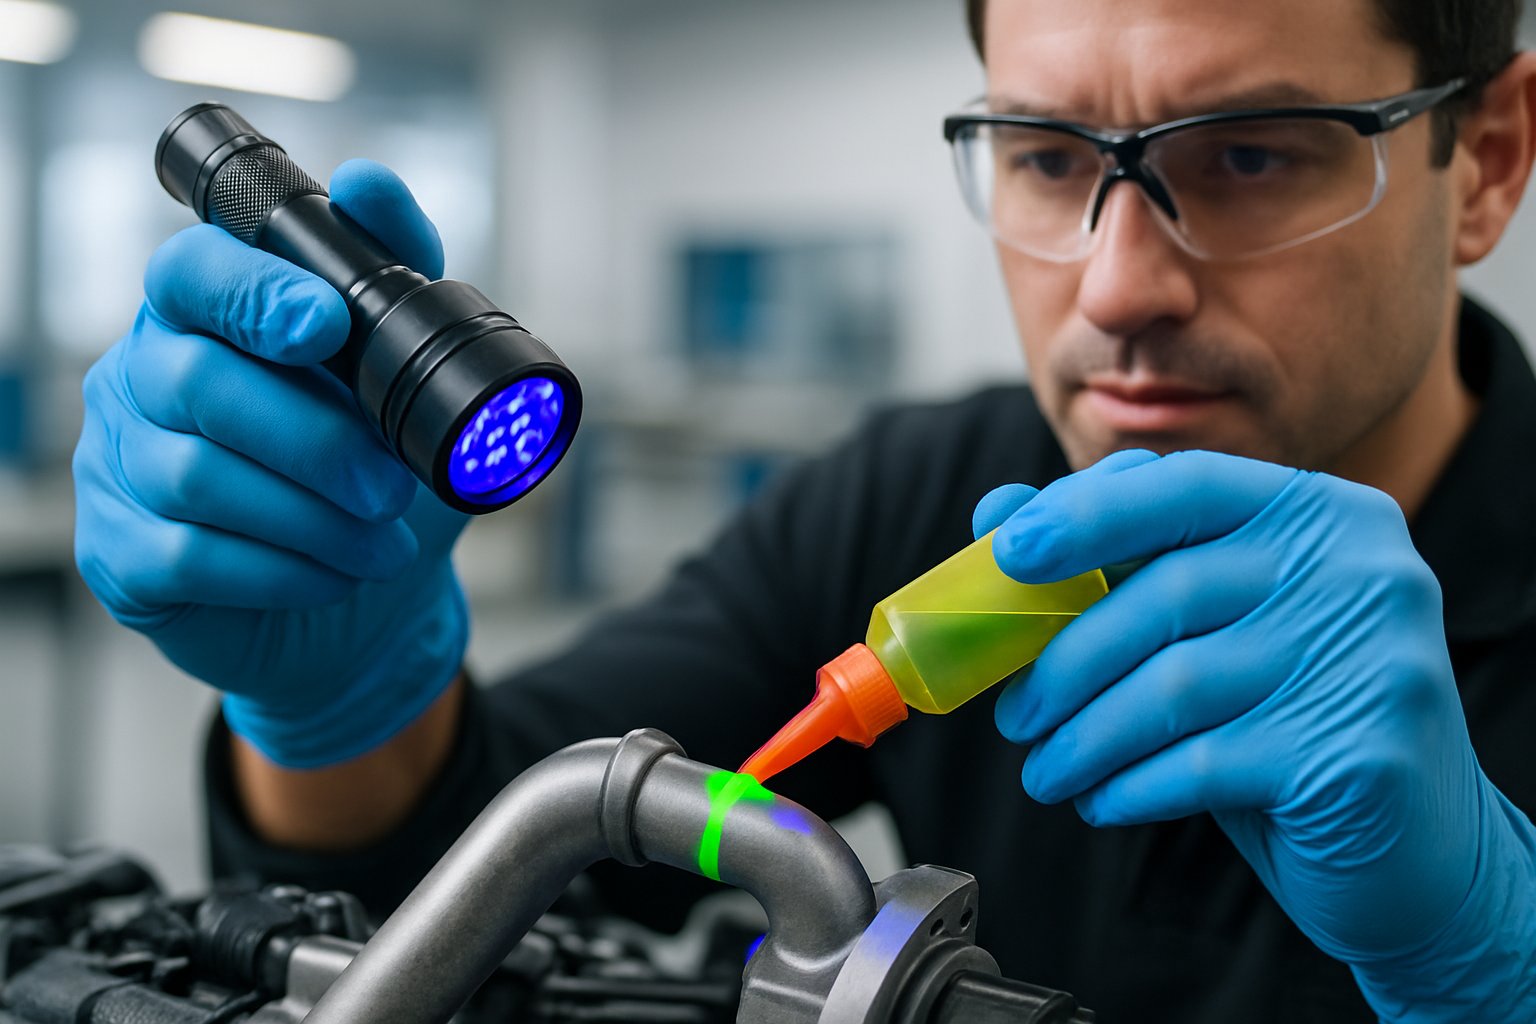
After circulation, a technician grabs a UV flashlight or lamp and inspects the system. The UV light makes the dye glow, so you can spot leaks—even in dark or awkward spots.
A good leak detection flashlight puts out the right UV wavelength to activate the dye. Most use UV-A, which lights up the dye in bright yellow or green.
The tech will scan pipes, joints, coils—anywhere leaks might hide. You have to look everywhere to make sure you don’t miss anything.
Visual Confirmation and Location of Leaks
When UV light hits a leak, the dye glows against the background. This lets technicians pinpoint exactly where the problem is—no guessing.
The glow might show up as bright spots, streaks, or even little dots, depending on the leak’s size and spot. Bigger leaks make bigger glowing stains; small ones might just be a tiny speck.
Techs mark each leak for repair and might snap a UV-lit photo for records. It’s possible to find multiple leaks in one go, which makes this method super efficient for checking out the whole system.
Key Equipment and Tools for Fluorescent Leak Detection
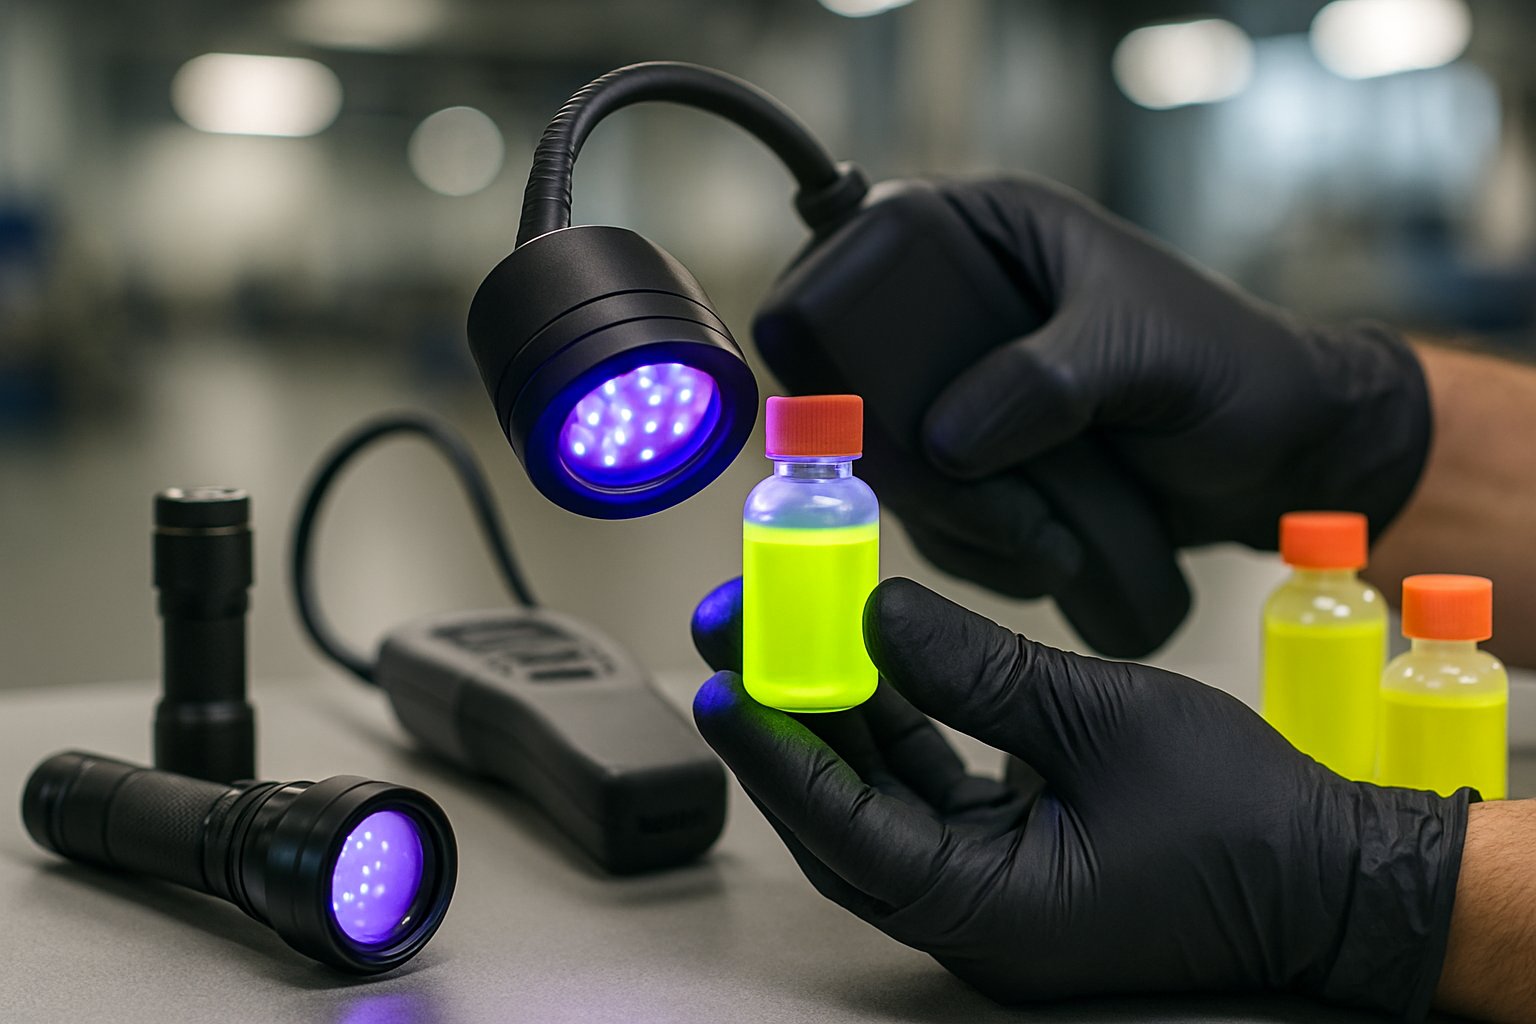
Fluorescent leak detection depends on two main tools: a UV lamp to make the dye glow, and some way to add the dye into the system.
UV Lamps and Leak Detection Flashlights
The UV lamp is your main tool for spotting leaks. It shines ultraviolet light that makes the dye pop out, even if the leak is tiny.
Leak detection flashlights come in all shapes and power levels. Most folks prefer handheld UV LED lamps—they’re portable and simple. They only use about 10 watts, about the same as a regular bulb.
They work best in the dark, so you’ll want to dim the lights to see faint dye traces. Top-notch UV lamps put out stronger light, which helps you catch even the smallest leaks.
Key features to consider:
- Wavelength range that matches your dye
- Battery life or plug-in options
- How bright and wide the light is
- Durability for fieldwork
Applicators and Injection Tools
You need the right tool to add dye to a closed system safely. The best method depends on pressure and fluid type.
Multi-dose cartridge injectors are popular—they let you control how much dye you add with a simple twist. These can handle pressures up to 450 PSI and hook up right to service ports on AC, hydraulic, or other systems.
Some injection kits come with extras like cartridges, adapters, and hoses. The cartridge size tells you how many systems you can treat—one might cover up to 2 gallons of lubricant or 25 pounds of refrigerant.
Common applicator types:
- Cartridge injectors with valves
- Syringe-style applicators for smaller jobs
- Direct-pour bottles for open systems
Applications in Refrigerant and HVAC Systems
Fluorescent dye leak detection is a go-to in HVAC and refrigeration work. It helps techs find leaks that old-school methods might miss and can really cut down on service time and repeat visits.
Detecting Refrigerant Leaks
UV dye leak detection works by introducing fluorescent dye into the refrigerant system. The dye circulates with the lubricant and refrigerant, escaping and building up at any leak site.
Technicians scan the system with a UV lamp. The dye glows bright green or yellow under UV light, making even tiny leaks stand out from a distance.
This method can spot leaks as small as a pinhead. You can find multiple leaks in one inspection, and intermittent leaks are easier to catch since the dye stays put at the exit point.
The dye stays in the system after injection. Technicians can recheck areas after repairs to confirm everything’s sealed—no need to add more dye.
Routine HVAC System Maintenance
Adding fluorescent dye works best as part of a comprehensive preventative maintenance plan. Technicians inject the dye before issues pop up, so they can check for leaks quickly during regular service visits.
EasyDye and similar products work with all commercial oils and refrigerants. They’re good for:
- Split systems
- Heat pumps
- Packaged units
- Mini-splits
- Microchannel coils
You can search for leaks while the HVAC system runs or even when it’s off. The dye stays active, so a quick scan with a UV lamp during routine maintenance only takes a few minutes.
Catching small leaks early helps prevent efficiency loss and equipment damage.
Benefits for Air Conditioning and Refrigeration Units
Fluorescent leak detection cuts service costs and boosts system reliability compared to old-school bubble solutions. Technicians spend less time hunting for leaks and get fewer callbacks after repairs.
This method helps avoid energy loss from hidden refrigerant leaks. Systems keep running at their best when leaks are caught early, which lowers utility bills and extends equipment life.
Food spoilage becomes less likely in refrigeration units, since you can spot leaks before temperature control fails. Technicians can safely check areas near moving parts without direct contact.
The dyes are non-toxic and approved by top compressor and AC&R equipment manufacturers. Over 50 million systems worldwide use this technology right now.
Advantages and Effectiveness of Fluorescent Dye Methods
Fluorescent dye leak detection offers higher sensitivity than traditional methods. Technicians can spot even the smallest leaks and cut down inspection time and costs.
The method works across many types of systems. It also provides long-term monitoring benefits.
High Sensitivity and Accuracy
Fluorescent leak detection makes even tiny leaks visible under UV light. The dye escapes through small openings and glows yellow or green when scanned with a UV lamp.
This method can find leaks as small as 0.1 oz per year. The bright glow makes it easy to pinpoint the leak, not just the general area.
Technicians can check hard-to-reach spots without taking equipment apart. The dye stays in the system for ongoing preventative maintenance, revealing new leaks as they develop.
Efficiency Advantages Over Other Leak Detection Methods
The fluorescent dye method finds multiple leaks in one go. Traditional methods often need several tests and may only find one leak at a time.
Inspection time ranges from 5 to 45 minutes, depending on system size. This speed saves labor costs and reduces downtime.
The dye works with different fluids, like refrigerants, coolants, transmission fluid, and power steering fluid. Unlike electronic detectors that sometimes give false alarms near contaminants, fluorescent dye gives clear visual proof of leak sites.
You don’t need special training—just basic UV lamp operation. Once injected, the dye circulates naturally with the host fluid, so there’s no extra equipment or monitoring needed.
Non-Invasiveness and Cost Impact
The dye mixes right into existing system fluids. Fluorescent leak detection dyes come ready to use with almost no setup.
System performance stays the same because the dye concentration is low. Modern dyes don’t have co-solvents that could harm components.
The materials are eco-friendly and break down within six months if released into the environment. Upfront costs include the dye and a UV lamp, but these tools work on many systems and last for lots of inspections.
UV lamps use only 10 watts, about the same as a standard light bulb. Early leak detection helps avoid expensive repairs from fluid loss or component damage.
Best Practices and Safety Precautions
Working with fluorescent dye takes some care and attention to safety. Knowing the right way to apply dye and protect yourself helps technicians spot leaks and avoid contamination or health risks.
Proper Dye Application
Adding dye into the system means working slowly to prevent spills and get accurate results. Inject the dye slowly and let it circulate for 5 to 45 minutes, depending on system size.
Most spills happen when opening service ports on pressurized systems. Pressure can spray dye if connections aren’t tight.
Technicians should check service ports before injection. Double-check that all fittings are tight and use the right adapter for each port.
The dye needs enough time to mix throughout the system. If you rush, you might miss leaks because the dye won’t reach every trouble spot.
System Compatibility and Eco-Friendliness
Not all dyes work the same in every system. Good-quality dyes don’t have co-solvents that could harm components or cause chemical reactions.
Temperature ranges matter for AC and refrigeration. Professional dyes usually handle -80°C to 250°C, but it’s worth double-checking your system’s requirements.
Modern fluorescent dyes use organic-free fibers that break down fully within six months in the ground. These eco-friendly formulas avoid harsh chemicals and stay in systems to reveal future leaks without causing damage.
Personal and Environmental Safety Tips
Wear protective eyewear and gloves when handling dye to keep it off your skin and out of your eyes. Make sure your workspace is well-ventilated, since pressurized systems can release dye particles into the air.
Knowing the risks of UV fluorescent dyes helps you take the right precautions. Keep UV lamps pointed away from your eyes and skin during inspections.
Clean up spills right away using absorbent materials. It’s smart to keep cleaning supplies nearby before starting any dye injection.
Store dye containers in cool, dry places out of direct sunlight. Label everything clearly to avoid mix-ups or mistakes.
Frequently Asked Questions
People usually have questions about timing, application, and how well fluorescent dye leak detection works in different systems. Understanding these details helps you get the most out of UV dyes and detection gear.
What are the steps for using leak detection dye in a pool?
Start by adding the right amount of fluorescent dye into the pool water near where you think the leak is. The dye needs time to move through the water and find any cracks or openings.
Once the dye has spread, use a UV lamp to scan the pool surfaces in low light. Leaks show up as glowing spots where the dye escapes. The whole fluorescent leak detection process takes 5 to 45 minutes depending on pool size.
How does a UV dye leak detection kit function?
A UV dye leak detection kit comes with fluorescent dye and a UV lamp. You add the dye to the system, and it mixes with the fluid as it moves through everything.
The UV lamp makes the dye glow wherever it leaks out. Even small leaks are easy to spot in the dark. The dye’s fluorescent properties really stand out under UV light, making leaks obvious to the naked eye.
Can fluorescent dye be used for detecting engine oil leaks?
Fluorescent dye works great for finding oil leaks in engines and other mechanical systems. Add the dye to the engine oil, and it circulates with the oil through the lubrication system.
When you scan the engine with a UV lamp, any leaked oil glows at the leak site. This method finds tiny pinhole leaks that are tough to see otherwise. The dye stays active and can reveal future leaks too.
What is the procedure to apply fluorescent leak detection dye?
Start by adding or injecting the dye into the system you want to test. Let the dye circulate with the host fluid so it reaches all possible leak points.
After it’s mixed in, use a high-quality UV lamp to check for leaks. Do the inspection in the dark so the glow stands out. Leaks will glow brightly where the dyed fluid escapes, making them easy to find.
What are the advantages of using fluorescent dyes in leak detection systems?
Fluorescent dyes can find several leaks at once, saving time and labor. The method detects tiny leaks that other approaches might miss.
These dyes work for both immediate leak detection and ongoing preventative maintenance since they stay active in the system. Professional-grade dyes don’t have co-solvents that could harm components, and many are eco-friendly and break down within six months without hurting the environment.
How do fluorescent dyes aid in the detection of gas leaks?
Fluorescent dyes mix with the lubricating oil or carrier fluid in a system. They travel with this fluid through gas lines and components.
When gas leaks out, it brings some of the dye along for the ride. The dye starts to build up right where the leak happens, and UV light makes it pop out visually.
This method works well for finding leaks in air conditioning systems and refrigeration units. It’s especially handy when other methods just aren’t cutting it.